Ok, ok, I know it's been a long time since my last blog post, but school has been pretty overwhelming lately. I've come to the realization that this whole paramedic program rules my life right now, and realistically if I want school to be worthwhile, I have to put the woodshop on hold. It breaks my heart, but that's how it's gotta be.
That said, I still haven't posted my latest work. Late last year, I got a call from Gus for a custom coffee table order. When I asked him what kind of look or design he was after, he just said, "I donno, just make it cool, make it 'Casey cool'. Make it something you cant buy from a store. I want people to walk in and go 'Whoa, where'd you buy that?', so I can say to them 'You can't buy one, you gotta call Casey to have him make one.'"
So to the drawing board I went. After mulling it over for a good couple of weeks, I decided on barnwood and hammered copper. It had to be unique, so I gave it a lot of extra detail. I designed in mortise and tenon joints, hand flamed and hammered copper inlay panels with square nail and square peg accents.
Square pegs. I love square pegs.
I like the way this shot shows a variety of details. The copper and tacks, good sawkerf texture, the texture on the magazine rack bottom level, and the faux through tenon.
A great view of the tack work.
One of the benefits of being in Central Oregon is that wood rot is easy to stabilize once removed from the elements and stored in a dry place. You get some extremely detailed points of interest, created by mother nature, as seen on the corner here. A couple square pegs top off the look.
The magazine level of the coffee table, made from old barn siding. You don't get much better weathering and character than this. Again, topped off by 100 year old hand cut square nails.
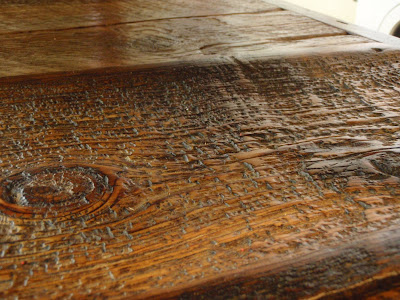
The matching piece on the opposite side of the magazine level. The wax finish just makes it pop like crazy. You can't help but run your hand over the texture of these old boards.
And now some of the construction process:
I added on some pine stock to beef up the underside of the top. It added a couple days to the project, but I wanted to be sure the weathered wood would be able to hold up the copper panels once in place without splitting out on the bottom.
The new pine, after being planed down flush with the old pine.
You can tell the old pine wood came from a much older tree by the tight grain lines when compared to the faster grown pine strip I added in.
Doing a little clean up on the mortise after adding the pine strip.
Here's a picture of the side board before I glued in the pine strip. The piece I'm working on was a piece that was not terribly stable. I removed it carefully in order to glue it back in, thereby making it much more likely to last down the road.
A little epoxy filler on the end grain to stabilize an old nail hole.
Planing down the new pine strip with my Stanley low angle block plane. Probably my favorite hand tool in my shop right now.
Here's the table before gluing and finishing. I was toying with different ideas for the bottom magazine level with various sized boards I had. I decided at this point that the top overhung the side rails too much, so you couldn't see the detail in them if standing close to the table. I tore it all apart and resized the top. That meant recutting all the mortises and tenons, another weeks worth of work.
Resizing the top also meant I had to resize my panels, which I had already adhered to the copper. I had to get creative to do it, which involved flipping the panels upside down on the tablesaw and running them on a backer panel to prevent scratching the copper. It shot copper shards into my clothes, arms and the garage door panel behind me, as well as creating the pretty scary edge in the picture.
This is what happens when you have to "get creative" with sharp copper! I'm still digging the copper shards out of this shirt.
Final glue-up on the top panel.
How a hand hammered finish works: 1. Get a sheet of copper. 2. Grab a pair of ball-peen hammers.
3. Earplugs in. 4. Apply hammers to copper in random fashion. (Get crazy!)
That's about all I have time to add to the blog today. Next time, I'll add some more 'in-process' pictures, with a few of the copper process and making the tenons for the table top. Thanks for looking!


