NEW ETSY WEBSITE COMING SOON!! Now under construction!

May 30, 2012

Cedar Folding Adirondack Chairs


The finished Adirondack Chair. 
To show the entire process would be pretty prohibitive, so here's how I did some of it:


The stock I'm using has a prefinished side on it, directly from the mill. After cutting the back slats on my new taper jig, I needed to remove all this stuff. After hitting many pieces with the belt sander, breathing in all the dust, making crazy noise, and a constant battle with clogging the sanding belt, I figured there had to be a better way. I looked around my bench, and there, basking in the filtered sunlight, was my Groz hand plane! AHA! Of course! Hand tools! No noise, no dust, faster, easier. 
With all the expensive machinery, sometimes I get complacent and forget to go back to the time honored traditions, and sometimes they work even better! I made up a jig to hold the long slat stock in my vise, and went to town. Shavings are so much nicer than dust!


After hand planing to remove the finish, I hit the pieces with a quick sanding to remove plane marks, then over to the router to put a nice "eased" edge on all the corners with a round over bit.

Close up of knocking off that rough edge. A bit with a bearing like this is super nice. Even, consistent results.


Before- with the square edges that would make the chair uncomfortable, and on the right after running it through the round over bit. Ahhhh....


Dust collector losing a little "Oomph?" Rubber gloves & wood blocks in the impeller- yep, that'll do it.


With all the seat slats clamped together, I traced the arc for the rounded back, and broke out the jig saw. BAD IDEA. The up-and-down motion of the blade tears out the end fibers of cedar VERY EASILY. next time, I'll make up a jig to hold the slats together so I can use the band saw, which only makes a downward cut through the top, so tear out is minimized, and it only happens on the back side.


Belt sanding the edges. The jig saw left a lot of tear out, so it took a lot of belt sanding.


Next its on to the drill press to predrill all the screw holes. I made a few marks on the fence, so I can center each piece in a second.


Using a countersink bit to "round out" the holes, allowing the screw heads to sit below flush. You wouldn't want to catch your Angora sweater on a screwhead, would you?


On to lining up the slats on the back frame. First I find the center, then do the sides. From there, filling up the middle is a piece of cake. Angel food. With lemon frosting.

Here's how to do the slats the hard way- assemble them in place, standing up, fighting gravity and not being able to see what you're doing while leaning way over the bench to do all your predrilling and assembly. 
NOT RECOMMENDED.


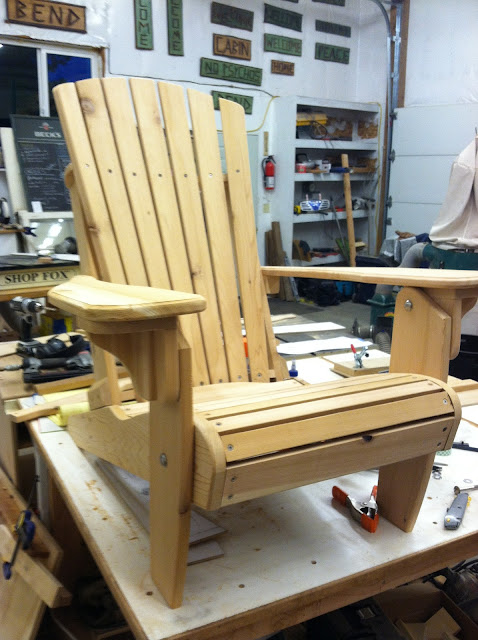
Coming along! Just needs some arms.


All done, just adding my stamp of approval.


Folded up and loaded in the truck for delivery.


Here they are at their new home- Mitch and Lesley's back yard. If there was ever a testing ground for outdoor furniture, this is it. Lots of entertaining, firepits throughout the year, snow, rain, sun, and of course dogs.


Not too shabby!


 The security team on this delivery was vicious!

Sunset on the Deschutes later that night, overlooking Les Schwab Ampitheater. What a terrible place to live, huh?
May 24, 2012

Cedar Grilling Planks and the Branding Iron

Cedar Grilling Planks are done!


 Just got the labels in tonight, got the order branded and packaged, and its all boxed up and ready for delivery first thing tomorrow! A little natural hemp rope to tie it all off. Not too shabby, eh?


 Here's my down and dirty branding jig. It's not glamorous by any standard, but it works fantastic. I started by working backwards from finding the center of my plank, then finding the edges of where the branding iron will sit. I layered up some scrap pieces of plywood at a 90 deg corner, reinforced it, and mounted it all to a big hefty piece of pine left over from the rustic entertainment center. The plank slides in place, then I take the hot branding iron, reference it in the corner, and set it down on the plank with a bit of pressure.


To heat the iron, I fired up a the weed burner torch on high, and set it just so on the gravel outside the shop, where it cant hurt anything. If you look close, you'll see the gravel starting to glow red. Almost ready!


 Test burn #1

 Test burn #2


Viola! I toyed with the idea of having a separate brand made just for the cedar planks, but this one I can use for almost everything I make in the woodshop.


 Sweet!


The branding iron leaves a slight discoloration around the logo, so it needed a bit of sanding to touch it up. Sanding also really helps define the logo itself, as you can see on the bottom of the two planks here.


...And what better way to celebrate completing the order than to grill up a tasty rainbow trout and corn on the cob? Thanks for the fish, Adam! Right out of Chickahominy Reservoir!

May 14, 2012

Sweethome Oak Tree- Mill Your Own Quartersawn Oak

Anna had a big oak blow down during a storm on one of her family's leased properties. She was able to get me permission to cut it up, so I decided to quartersaw the big stuff, and slab some of the medium sized pieces. The branches and anything I cant use for furniture will go in the firewood pile. Lots of work ahead!

Anna in front of her oak tree.

Here she is midway up the trunk- it probably extends another 20 feet past her to the butt of the tree. The end is held off the ground by massive branches- maybe 15 feet in the air?


After about 2 hours of work. Big trees make for nice piles of logs! It was tricky getting this thing out of the air in mid suspension, off its branches.


Johnny Utah, doing his best to look annoyed for making him pose.


And here's why it came down- massive ants nest in the trunk.


ANTS! I found them the hard way, and lets just say it wasn't a pleasant surprise for them or for me! Millions of those little suckers.


A nice ant/sawdust mix. These buggers are AGGRESSIVE.


I left the ants alone for a while and moved on to a section just up from there- (although they were still all over the place, crawling up my pantlegs and biting the heck out of me.) 
Quartersawing wood, step 1: split it in half. I cut as deep into the log as my chainsaw would allow, in about an 8 foot section. I then used old axe heads and pulaski heads as wedges. Ehen the split got big enough, I cut some oak wedges from a smaller piece laying around, and pounded that in.


After it got going, I just kept adding more wedges until she split open. You can start to see how much rot was in the middle of the oak. There's still a good amount of usable wood here.


Finally got it. If the middle wasn't so rotted out, this would make a really great table top.


Step 2: The quartering begins. This one wasn't splitting very easily, so I fired up the chainsaw and ripped down the middle to get started. From  here, I'll mill these in half again so I can handle them, then rip them and start dimensioning to turn them into usable material. After that, to the dry kiln they go.
This really cool old abandoned house was staring at me while I worked all day. (you can barely see it in a couple of the photos above) Just had to take a photo with the incredible stormy spring sky in the background.


I love spring in the Willamette Valley! If I didn't know how wet and bleak and dreary the winters were, this kinda stuff might just make me wanna move back.


You wouldn't guess that just over an hour ago I was in beautiful, lush spring conditions. There was fresh snow on the pass on my way home just that morning. And that little dot on the road ahead of me- that's a bobcat.


Just happened to have my camera out to snap a shot of this still very wintery pass, when a bobcat crossed the road ahead of me. I couldn't believe my timing. Like he was on cue! Hwy 20 in Oregon is one of my favorite mountain passes I've ever driven. It's windy, steep treacherous, gets shut down due to weather and slides all the time, but absolutely a gorgeous drive with hardly any traffic. The river just dumps right out of the mountains, and is so beautiful it makes me sick. I can't wait to get my motorcycle out of the shop to hit this up.