Here's the wrap up of the project, with some metal work, finishing touches, and killer accents.
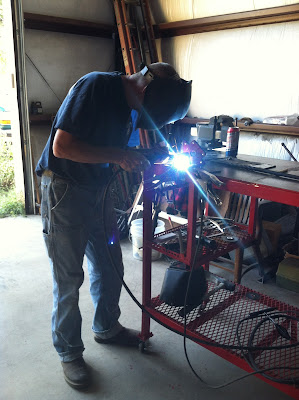
Captain Willis, from Sunriver Fire Department, setting up to weld the carying handles in his new shop, just down the road from mine.
Not a bad pic for looking the other way while I took it!
Meeeeanwhile, I was playing with the cutting torch, working on the other set of brackets for the handle on the opposite side.
I heated the brackets with the cutting torch until glowing red hot on the outer edge.
Once the metal was hot enough to melt through the floorboards...
...I smashed it up with a ball peen hammer to give it a hand forged look. Then I'd move on the the next edge and do the same.
Once Cpt Willis had them all welded up, I took the angle grinder to them to clean up the welds before priming and painting.
 Meanwhile, back at the bat cave, this is what two weeks of long days will do to your workbenches if you don't make time to clean up after yourself. What a pigsty!
Late last night, on a buddy's suggestion, I decided to embed a couple of the department's challenge coins in the back end of the sand table. When I had an issue with epoxy setting too fast on the second one, I had to quickly drill it and hammer it out. My buddy Nick saved the day when he mixed up some magic caustic chemicals and dissolved the setting epoxy off the coin. He probably now has cancer, but at tleast he got the epoxy off!
Because of the hasty coin removal, the setting for the coin was slightly hacked up. I thought of heading to the hardware store to find a brass ring or something, but then came up with the idea of using some of the same walnut to match the accent trim to make my own.
To make these trim rings, my roommate Logan came up w the idea of using the drill press. I first used a forstner bid to hog out the middle, then keeping the stock in the same position, changed out the forstner bit for a hole drill to cut the outside of the ring. I then pried out the wood from the hole bit, hand sanded it to round it over, and glued them in place.
30 minutes later, I removed the weights that were holding them down, and threw on a couple coats of spray finish. Still wet in these pictures. (The camera makes it look like they're lop sided, but it's just an illusion. They came out perfect!)
Finished product, just delivered this morning! I have the trap door pulled out here for the photo. This is made this way so it can be joined with other training tables to incorporate an unrban environment or something similar, while still allowing the option of closing it for transport.
The "sand" is actually ground pummice. It's much lighter, a little cleaner, easier to shape, and looks pretty cool to boot.
I really dig the way the handles turned out. Cpt Willis had a hard time welding the thin handle bar stock to the heavy steel brackets without overheating them, while trying to get good penetration. Next time, I'll use heavier guage steel for the handles.
Found these finial end caps that worked out great!
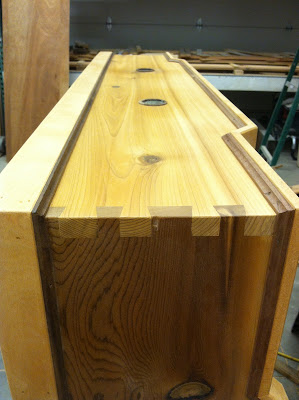
The contrasting walnut trim really makes it "pop!"
Love the look of dovetails!
Schweet.


