PART 2-
I've had these reclaimed maple door casings for years, waiting for a worthy project to use them on. They're from an old school in Oregon that was torn down- not sure which one, but they were all labeled in cursive from where they were installed- this one was from the journalism room.
I made a cut and realized not all the nails were removed from the old maple- one of the big drawbacks of using reclaimed material. Dinged up my saw blade, but I have had a replacement for just such an occasion for a while.
The new blade. My old Diablo blade came with the saw, and was pretty much brand new then. It's been awesome for all kinds of cuts on different materials, so I was eager to install the new Forrest Woodworker 2 and compare.
My Grizzly table saw doesn't have a blade lock (that I know of) for changing out blades. I use a scap cutoff as a lever to keep the blade stationary while I loosen and tighten the nut holding it on.
New blade came with the teeth dippin in a plastic to protect the edge (and my sensitive little hands.)
I'm due to upgrade my shop made zero clearance insert. Small cuttoffs could fall in the void created by my dado blade, leaving my hand in the spinning sharp teeth. I don't want the nickname "Stumpy" just yet.
In storage, they haven't had an easy life. A little wobbly and crooked, the first stage was to flatten an edge. Because of the narrow profile, I decided it was best done with my taper jig on the table saw instead of the jointer. Not sure this was the best idea- the ends were a bit tricky.
There were some larger pieces of stock that needed resawn also. Cutting these made me really realize exactly how bad I need to make some more functional featherboards. (A featherboard holds the wood tight to the table saw fence, making it way safer, even pressure, and keeps your fingers out of the way.)
sanding off the sawmarks top, bottom, and edges.
Here it is installed, with 45-degree mitered corners.
Next was to install the top maple trim.
While I was doing detail work, I kept getting destracted by this knot. It wasn't entirely stable. To remedy this, I started by using the fine tip of an Exacto knife to cut away the loose layers surrounding the knot.
I then squeezed in super glue, then pressed it down into the cracks and spread it evenly with a scraper. Once cured, I sanded off the excess.
Making up a little matching wood putty to fill nail holes. To get the color to match closely, I used sanding dust from the palm sander container, mixed it with glue until the consistency of gooey cookie dough, then...
...spead it in nail holes from the reclaimed maple trim.
Top trim installed and nail holes filled and dried. I'm taking a card scraper here to hog off the excess filler prior to sanding it out.
_____________________________________________________________________________
It was about this time my roomate came out to the shop to let me know he had just got home and "Uh... I turned the oven off..." Oh crap! I had left the house to just go tinker in the shop for a minute while my banana bread finished cooking in the house. There were six minutes left on the timer when I walked to the shop.
That was 2 hours ago.
_______________________________________________________________
This is what banana bread looks like after 3 hours at 350 degrees:
Pretty decent burn ring around the edge. I had to take it outside and leave it on the bbq to cool off. The carbon smell eminating from these two loaves lingered in the house for days. Even with several heavy duty treatments of Febreeze and 24/7 open windows and doors.
To make matters worse, while I was trying to burn the house down with my blunders in baking, I found that a gust of wind had tipped my shade tent over, knocked several lawn chairs off the deck and a planter, and snapped a couple of the tent legs off at a critical, non repairable point.
Not awesome.
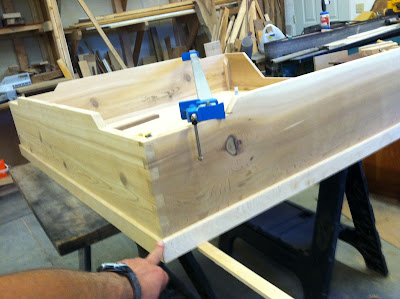
Back in the shop, I worked on the fit of the walnut trim, adjusting the seams to make them match up as finely as possible. Here, I'm using my trusty cardscraper again to clean up the joints. The walnut adds a nice shadow line as well a contrast between the lighter maple and cedar combo.
After scraping, here I'm using a sanding block to knock down all the rough edges on the interior of the table. (on it's side)
Next post: PART 3, metalwork and welding, then finished product!
Click here to go right to the next post:
http://rusticworks.blogspot.com/2012/08/fire-department-sant-table-part-3.html
Click here to go right to the next post:
http://rusticworks.blogspot.com/2012/08/fire-department-sant-table-part-3.html


This comment has been removed by a blog administrator.
ReplyDelete