NEW ETSY WEBSITE COMING SOON!! Now under construction!

August 22, 2012

Fire Department Sand Table, PART Deu

So in PART 1, I milled up the cedar for the main body of the big ol' topless box, routed out dovetails, did some sanding, and glued the pig up. Here's what happened after:

PART 2-
I've had these reclaimed maple door casings for years, waiting for a worthy project to use them on. They're from an old school in Oregon that was torn down- not sure which one, but they were all labeled in cursive from where they were installed- this one was from the journalism room.
 
 
I made a cut and realized not all the nails were removed from the old maple- one of the big drawbacks of using reclaimed material. Dinged up my saw blade, but I have had a replacement for just such an occasion for a while.
 
 
The new blade. My old Diablo blade came with the saw, and was pretty much brand new then. It's been awesome for all kinds of cuts on different materials, so I was eager to install the new Forrest Woodworker 2 and compare.
My Grizzly table saw doesn't have a blade lock (that I know of) for changing out blades. I use a scap cutoff as a lever to keep the blade stationary while I loosen and tighten the nut holding it on.
 
 
New blade came with the teeth dippin in a plastic to protect the edge (and my sensitive little hands.)
 
 
I'm due to upgrade my shop made zero clearance insert. Small cuttoffs could fall in the void created by my dado blade, leaving my hand in the spinning sharp teeth. I don't want the nickname "Stumpy" just yet.

In storage, they haven't had an easy life. A little wobbly and crooked, the first stage was to flatten an edge. Because of the narrow profile, I decided it was best done with my taper jig on the table saw instead of the jointer. Not sure this was the best idea- the ends were a bit tricky.
 

There were some larger pieces of stock that needed resawn also. Cutting these made me really realize exactly how bad I need to make some more functional featherboards. (A featherboard holds the wood tight to the table saw fence, making it way safer, even pressure, and keeps your fingers out of the way.)
 
 
sanding off the sawmarks top, bottom, and edges.
 
 
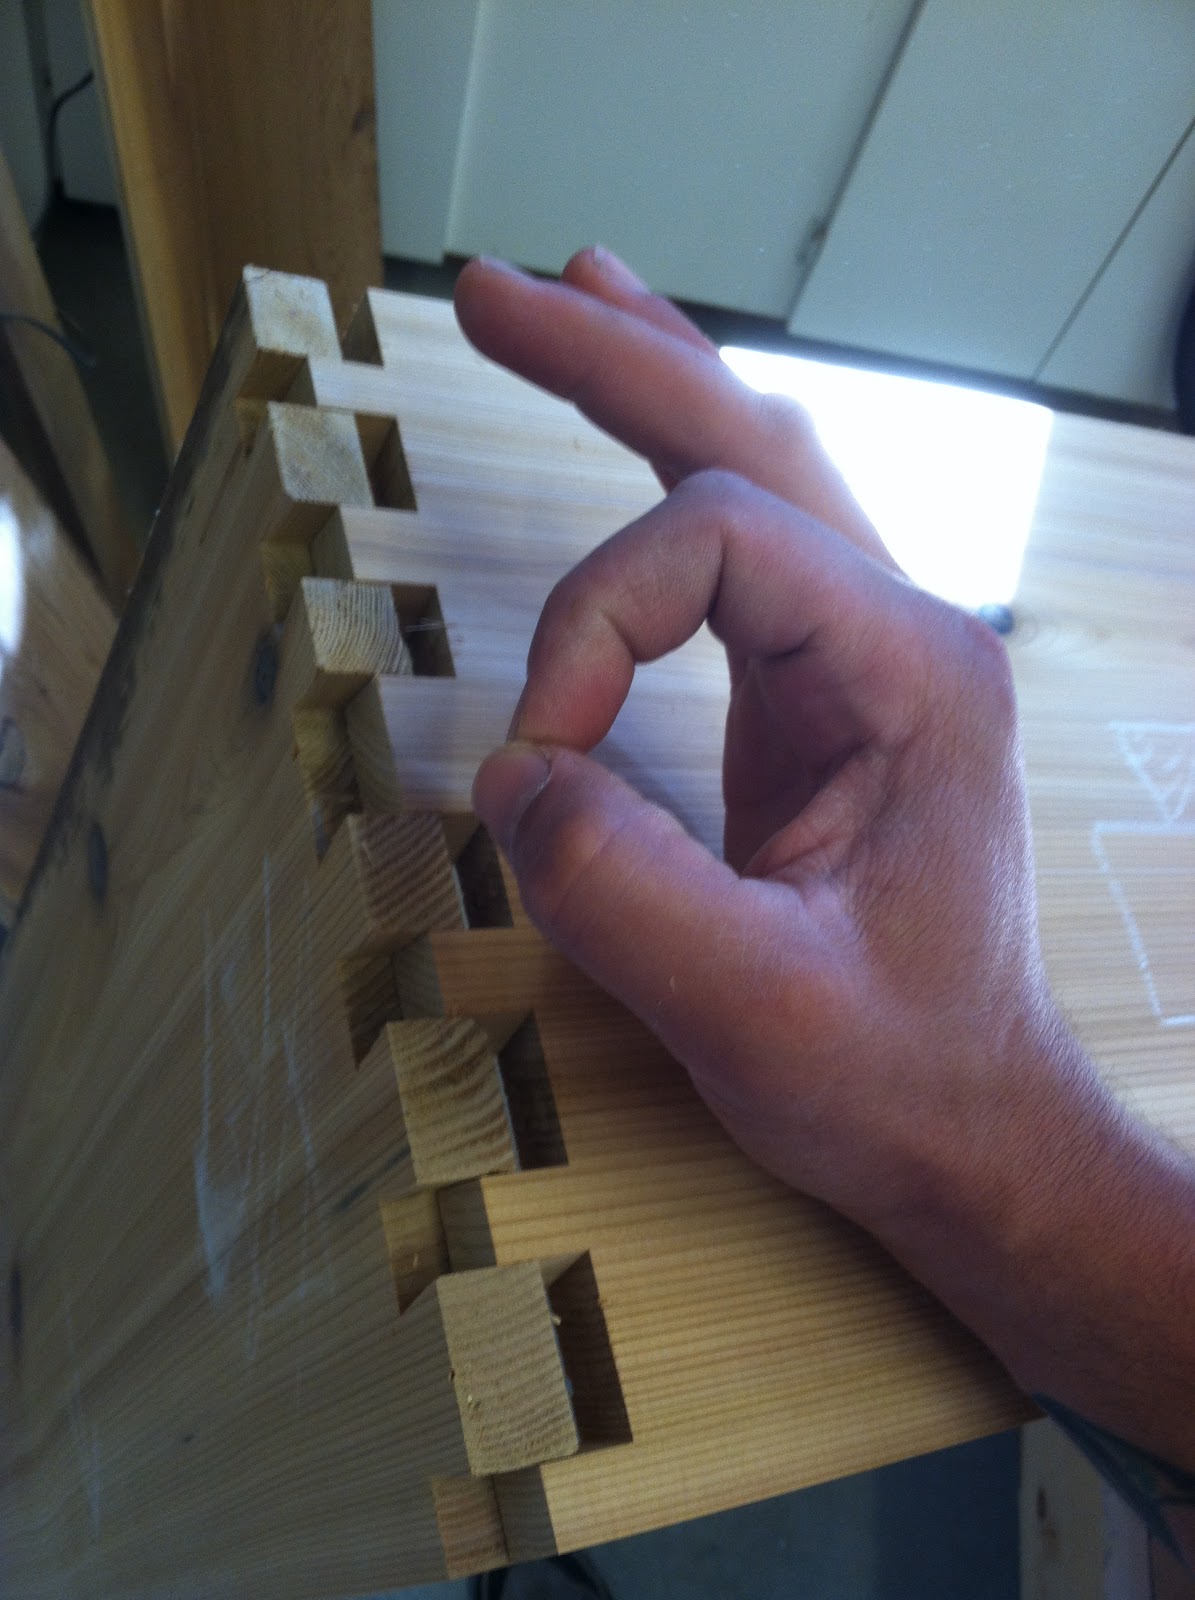
Here it is installed, with 45-degree mitered corners.
 
 
Next was to install the top maple trim.
 
 
While I was doing detail work, I kept getting destracted by this knot. It wasn't entirely stable. To remedy this, I started by using the fine tip of an Exacto knife to cut away the loose layers surrounding the knot.
 
I then squeezed in super glue, then pressed it down into the cracks and spread it evenly with a scraper. Once cured, I sanded off the excess.
 
 
Making up a little matching wood putty to fill nail holes. To get the color to match closely, I used sanding dust from the palm sander container, mixed it with glue until the consistency of gooey cookie dough, then...


...spead it in nail holes from the reclaimed maple trim.


Top trim installed and nail holes filled and dried. I'm taking a card scraper here to hog off the excess filler prior to sanding it out.
 
 
_____________________________________________________________________________
It was about this time my roomate came out to the shop to let me know he had just got home and "Uh... I turned the oven off..." Oh crap! I had left the house to just go tinker in the shop for a minute  while my banana bread finished cooking in the house. There were six minutes left on the timer when I walked to the shop.
 
 
That was 2 hours ago.
_______________________________________________________________
 
 This is what banana bread looks like after 3 hours at 350 degrees:
 
 
 Pretty decent burn ring around the edge. I had to take it outside and leave it on the bbq to cool off. The carbon smell eminating from these two loaves lingered in the house for days. Even with several heavy duty treatments of Febreeze and 24/7 open windows and doors.
 
 
To make matters worse, while I was trying to burn the house down with my blunders in baking, I found that a gust of wind had tipped my shade tent over, knocked several lawn chairs off the deck and a planter, and snapped a couple of the tent legs off at a critical, non repairable point.
Not awesome.


 Back in the shop, I worked on the fit of the walnut trim, adjusting the seams to make them match up as finely as possible. Here, I'm using my trusty cardscraper again to clean up the joints. The walnut adds a nice shadow line as well a contrast between the lighter maple and cedar combo.
 
 
After scraping, here I'm using a sanding block to knock down all the rough edges on the interior of the table. (on it's side)
 
 
Next post: PART 3, metalwork and welding, then finished product!

Click here to go right to the next post:
http://rusticworks.blogspot.com/2012/08/fire-department-sant-table-part-3.html


Fire Department Sand Table, PART 1, Body Construction

I was asked to build a sand table for Sunriver Fire Department. I imagine most people that are not firefighters will wonder what the heck a sand table is and what the heck a fire department does with one. Good question! They're used for "table top" style training, where you can create different landscapes, layouts or scenarious on a miniature scale. It's like a sand box for more serious big kids!

Here's the finished product. Read on to see how I got it to this!
 
The process for this table was pretty involved, (ie looong...) so I divided it up into separate posts to help keep it organized. Here's how it all developed:

Step 1: Body creation.


I decided to build the body of the table out of some really beautiful cedar stock- same stuff I use for all my Adirondack outdoor furniture.


First I laid out the pieces I wanted from each board, cutting out any of the ugier defects at the chopsaw station.
 
 
This stock has been pretreated on one side with a penetrating oil finish, so once I got all my boards selected...
 
 
...I ran them through the sander to take off the old finish.
 
The nice thing about the sander is that it works as a very fine scale planer, removing up to as little as less than 1/64th of an inch, without any snipe or tear out like you might have from a big planer.
 
 
...after a few more passes.
 
 
Fine tuning the thickness. Dead-on @ 3/4 inch. Sweet! It's gotta be an even thickness to get the next process to come out right- dovetailing.


 So over to the Leigh dovetail jig. This thing is really incredible, but as you can tell by the dust buildup, I haven't used her in a while...
 

 Sizing it up and deciding on the dovetail layout in the jig.


The stand I built for it worked out perfectly with the workbench height. Just tall enough to fit the 4 foot long boards in there!


 Since I was routing at near eye level, I opted for the super fashionable full face protection.
 
 
 Uhhh.......
Works great!
 
 
The fit is just a liiiiittle to tight. It should go together with light taps from your hand, but not need a mallet to pound it in- otherwise it'll be too tight for glue. A small adjustment of the scale on the jig will fix this right up.
 
 
Slides right in. Like it was made to go there or something... (ahem... cough...)
Now, the depth needs a minor adjustment to get these to line up a wee bit closer.


With a minor adjustment back at the router, lowering the bit just a smidge...


 ...and Walla! She's a beaut, Clark!


 Next I routed the groove for the 3/4 inch plywood bottom. It's important to leave a little "ledge" at the bottom (right side of the pic) to hold the bottom in so it doesn't just fall out or break off under the weight of contents.


 Time for a coffee break.
(I actually did this. Hilarious.)

 
 Glue up was a bit interesting. With dovetails, it's important to spread glue on every mated surface. As you can imagine, it takes a while for all those little parts to get coated. You have to work fast so the glue doesn't set up before you finish getting it all clamped together. STRESS POINT! ...Especially when you realize that your clamps aren't long enough to reach the other side! Came up with this solution last minute- using wooden hand screw clamps in the middle, I just used them as the center point between clamps from opposite sides.
Not ideal, but not bad in a pinch.


 Here she is, all glued up and ready for sanding.


  Sanding it up. I need to wire up a grounding kit. When using the palm sander connected to the shop vac, it's pretty effective at collecting all the dust, but it shocks the living crap out of me from static buildup!

 In routing out the groove, I ended up with a big chunk of tear out from the sensitive dovetails on the front side. No big deal though, because this section will be covered with trim anyway.

NEXT UP: Part 2 Trimming out the sand table.

Click here to right to the next part:


August 10, 2012

Outdoor Picnic Tables

I got an order for some outdoor picnic tables for a local bar in town (thanks Josh!) to get the front patio refurbished and more inviting. As usual, I was sad to see them all go- I should have made an extra and kept it around!

Here they are in my backyard, just outside the shop door. Looks like a pretty nice spot to take 5, right?


 What the stack of lumber looked like after a trip to the lumba yawd. All that kiln-dryed potential, ready to be made into something cool.


 I did all the assembly and layout right on the trailer. Made it pretty nice not to be bending over the whole time. I started top side down, but eventually flipped it all over when I realized how long the screws would have to be to put it together this way.


 The first picnic table, end of day one. Coming together nicely. Just needs a few more cuts and about 35 more screws, and assembly will be done.


 Table one done! Now that I got the kinks worked out, the next two should just fly by. Actually, the finishing touches took just as long or longer to do than assembly. I sanded all the edges, rounded all the sharp corners, and knocked off all the factory marks with a random orbit sander.


Here they are fresh off the trailer at their new home. Umbrellas should be there any day to complete the look.
Finish was still a bit sticky, but that wore off by the end of the day, as the finish cured in the sun pretty rapidly. I used 3 coats of stain sprayed on, with 3 coats of spar urethane thinned down about 5% with mineral spirits, so it would flow through the spray gun better.


Here you are! Just found this neat map on my blogger homepage. This is the demographic map of where all you people are viewing my blog from. Pretty cool!